
-
Table of Contents
Why You Should Fret Level Your Guitar: A Guide to the Benefits of Fret Leveling
The guitar is a complex instrument that requires a great deal of maintenance and upkeep in order to keep it sounding its best. One of the most important maintenance tasks that should be performed regularly is fret leveling. Fret leveling is the process of ensuring that the frets on a guitar are level and even, allowing for optimal playability, tuning, and tone. This process is essential for any guitar player who wants to get the most out of their instrument.
The primary benefit of fret leveling is improved playability. When the frets on a guitar are not level, it can cause the strings to buzz or rattle when played. This can make it difficult to play chords and notes accurately, and can lead to frustration and poor performance. By leveling the frets, the strings will be able to vibrate freely, resulting in improved intonation and a smoother playing experience.
Another benefit of fret leveling is improved pitch accuracy. When the frets are not level, the strings can be pushed out of tune when pressed down. This can lead to a muddy or out-of-tune sound. By leveling the frets, the strings will be able to vibrate freely, resulting in improved clarity and sustain.
Finally, fret leveling can help to extend the life of a guitar. When the frets are not level, they can become worn down more quickly due to the uneven pressure placed on them. This can lead to premature wear and tear, and can even cause the frets to become loose or fall out. By leveling the frets, the pressure will be evenly distributed, resulting in a longer lifespan for the instrument.
In conclusion, fret leveling is an essential maintenance task for any guitar player who wants to get the most out of their instrument. Not only does it improve playability and tone, but it can also help to extend the life of the guitar. For these reasons, it is highly recommended that all guitar players take the time to level their frets on a regular basis.
How to Fret Level Your Guitar: A Step-by-Step Guide to the Process
Fret leveling is an important part of maintaining a guitar’s playability and sound quality. It involves removing any high or low spots on the frets, which can cause buzzing and other issues. This guide will provide a step-by-step overview of the fret leveling process.
Step 1: Prepare the Guitar
Before beginning the fret leveling process, it is important to prepare the guitar. Start by removing the strings and cleaning the fretboard with a soft cloth. This will help to remove any dirt or debris that could interfere with the fret leveling process.
Step 2. Tape the Fingerboard
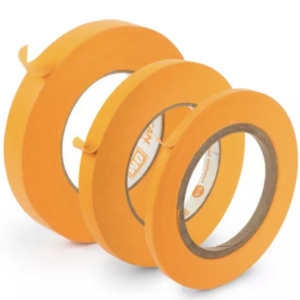 To protect the fiberboard and pickups, you should tape them. Use general purpose tape of varying widths to tape the fingerboard. I recommend using Stewmac Orange Multi-Purpose Tape which comes in 1/4″, 1/2″, and 3/4″ widths. Start with the largest width tape that fits between the frets. Use a second width tape to cover any remaining exposed fingerboard between the frets. It’s important to protect the fingerboard from any mishaps, especially during the the fret crowing step.
Step 3: Tape the Pickups
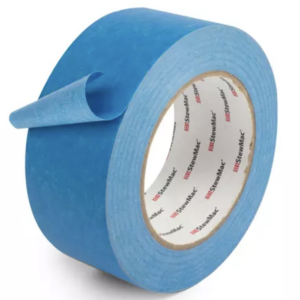 Leveling and crowning the frets creates small metal shavings. It’s important to use tape to cover the pickups otherwise the magnets in the pickups will attract the metal shaving. Not only will it be hard to clean up, it could affect the sound and performance of your instrument. Common 2″ Blue Painter’s tape from your local hardware store or from Stewmac’s Blue Painter’s Tape is sufficient for covering the pickups.
Step 4: Level the Frets
 4A: Once the fretboard is clean and taping is done, it is time to level the frets. Start by placing a straightedge across the frets and checking for any high or low spots. Adjust the truss rod up/down as needed to get the frets as close to level as possible. Ultimately you don’t want the straight edge to rock on any high spots. At the same time it is easier to level a high spot towards the center than it is to bring down the level of the ends to a low spot in the center. This is a skill that comes with experience to adjust the neck as best as possible. Also keep in mind that most older guitars as well as some modern ones come with truss rods that will only adjust with upward pressure and downward adjustments are just relief. Some modern truss rods are adjustable in both directions.
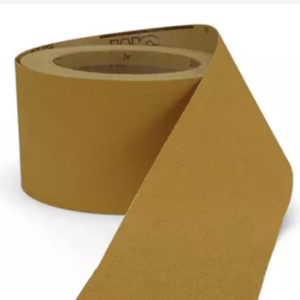
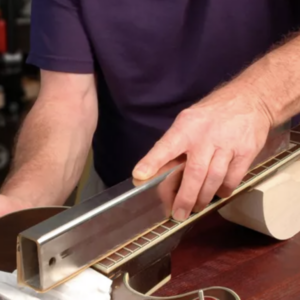
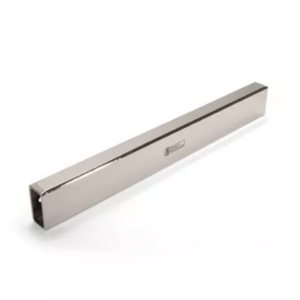 4B: Once as straight as possible, use the Stewmac Fret Leveler outfitted with the 3M Stikit Gold Abrasive to bring all fret heights to the same level. If the 1″ rolls are out of stock, you can also use 3M Stikit Gold Abrasives 2-3/4″ Roll. Use light pressure and move the Leveler in a long back-and-forth motion along the length of the neck. Let the weight of the Leveler to the work rather than pushing down. Because the neck has a radius to it, try not level in the same place. You can criss cross too… if starting at the heel end on the left and cross over to end on the right near the nut, etc. Again this will come with experience but the idea is do not keep sanding in the same path.
Step 5: Check the Frets
Once the frets have been leveled, it is important to check them for accuracy. Place the straightedge across the frets again and check for any high or low spots. If any are found, go back and repeat step 4B until complete. Note: If you are encountering a problematic neck, you should carefully re-inspect the neck for frets that might not be fully seated. It should also be noted that in some rare cases guitars have been known to make it out of the factory with a neck that has back bow or to develop back bow (especially if bare wood necks). Guitars without a 2-way truss rod and necks with back bow are nearly impossible to remedy and the only solution is to install a new neck.
Step 6: Crown the Frets
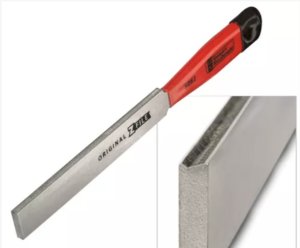
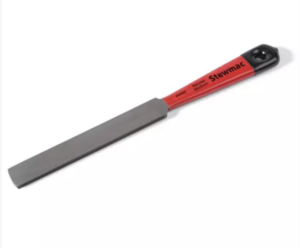
This step is often skipped from the factory on lower end guitars because it takes time and time is money. You can improve the quality of your guitar simply by crowning the frets. Frets that are leveled but not crowned are flat and do not have a single peak point of contact. Crowning the frets will bring back the original curvature to your frets and will make the frequency of the note being played more precise. There are multiple tools out there which are design to crown the frets. Some available tool for crowning are the StewMac Compact Z-File Fret Crowning File, Stewmac Offset Diamond Fret File, StewMac Z-File Fret Crowning Files, and the Stewmac Double-edge Fret File. It’s best to crown the frets after leveling but before polishing because the leveling process leaves sanding marks crossing the frets lengthwise with the neck which will help you. Crowning the frets will file/sand the frets crosswise in the opposite direction. This will help you to visually observe the fret’s flatness become a smaller and smaller as you bring the curvature back. Continue until you have the thinnest line possible without going too far.
Step 7: Polish the Frets
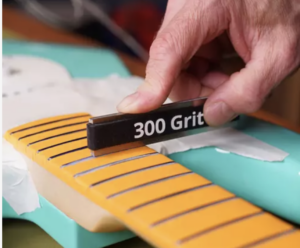
Once the frets have been leveled and checked for accuracy, it is time to polish them. Use a #000 fine steel wool to remove any remaining debris and give the frets a smooth finish.
Step 8: Clean Up and Re-String the Guitar
Once the frets have been leveled and polished, it is time to clean any particles from the guitar, remove the tape and re-string the guitar. Start by threading the strings through the bridge and then winding the strings around the tuning pegs. Finally, tune the strings to the desired pitch.
Fret leveling is an important part of maintaining a guitar’s playability and sound quality. By following the steps outlined in this guide, you can ensure that your guitar’s frets are level and polished, allowing for optimal performance.
The Pros and Cons of DIY Fret Leveling: What You Need to Know Before Taking on the Task Yourself
DIY fret leveling is a task that requires a great deal of skill and precision. It is a process that can be done by a professional luthier or a skilled DIYer, but it is important to understand the pros and cons of taking on the task yourself before attempting it.
The Pros
The primary benefit of DIY fret leveling is cost savings. Professional fret leveling can be expensive, and DIY fret leveling can be done for a fraction of the cost. Additionally, DIY fret leveling can be done at any time, allowing you to make adjustments to your instrument as needed.
The Cons
The primary downside of DIY fret leveling is the risk of damaging your instrument. If done incorrectly, fret leveling can cause irreparable damage to the frets and the neck of the instrument. Additionally, DIY fret leveling requires a great deal of skill and precision, and it is easy to make mistakes that can be difficult to fix.
Conclusion
DIY fret leveling can be a great way to save money, improve a guitar’s quality, and make adjustments to your instrument as needed. However, it is important to understand the risks associated with DIY fret leveling before attempting it. If you are not confident in your ability to do the job correctly, it is best to leave it to a professional luthier.